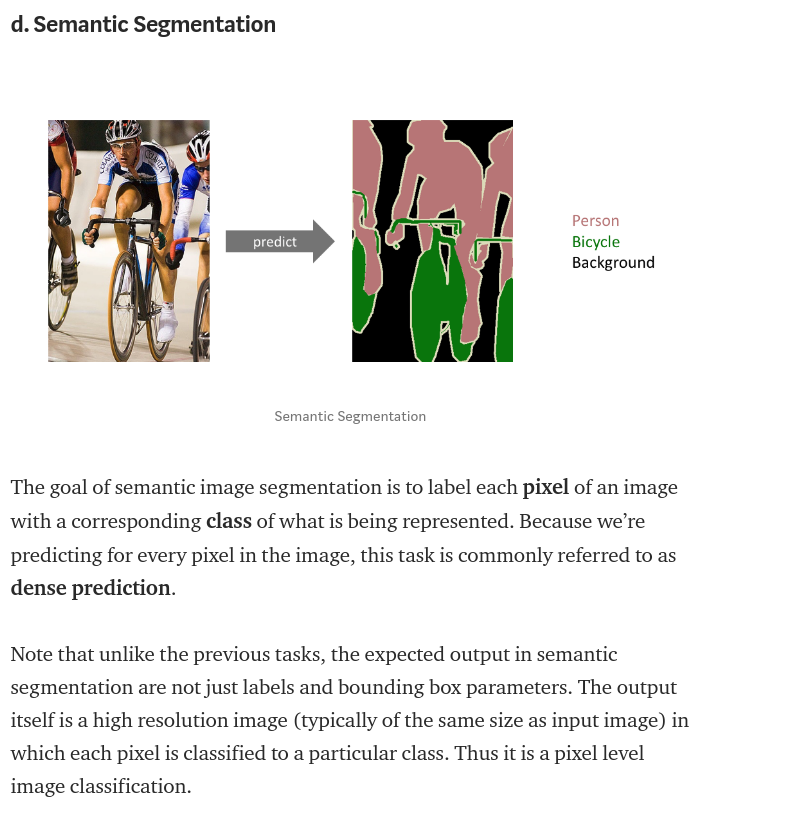
Semantic Segmentation / Background Subtraction with Deep Learning
Abstract: getting into deep learning sounds big but it is quite simple. In this post, I listed the steps from one of my projects to show you how to train your network. BTW when your segmentation only has two classes, which is either foreground or background, then it becomes a Background Subtraction!
Ask yourself
If you ask me what is the most difficult thing in deep learning, I will definately tell you is to process your data properly. Here are some questions/confustions that caused a lot problems to me when I started the project.
- How to correctly setup your environment
- How to read in images from a folder
- How to handle the image channels? and what are the channels?
- What network should I use?
- What indicates me that my training process is going towards a right direction, if it is wrong, how am I suppose to know?
- How to generate my data?
- What can I do to improve my accuracy?
1. Environment
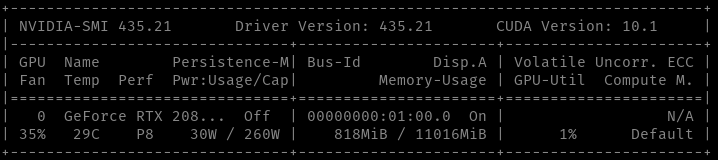
When you step into anything, a lot of people give up after they set up the environment. Why? because it takes too long and the long time dumps your passhion out. But don't worry, this means we are humans and we all did that. Actually, for myself, it is well worth to spend a big time to setup my office environment before I do any work because that is the table I need to coding on for hours. However, that sentance is true only if my goal for today is to setup up my table! Whereas Your goal is not, so let's not waste time on that, just go and buy an RTX 2080 Ti card and use my conda config:
Quick tips:
Create the environment from the environment.yml file:
conda env create -f environment.yml
---
conda env export > environment.yml
https://github.com/codyhex/setup_scripts/blob/master/tf-keras-gpu-unet.yml
However, as Alex pointed out in the comments, conda doesn't seem to care about the prefix line when creating an environment from file. With that in mind, if you want the other user to have no knowledge of your default install path, you can remove the prefix line with grep before writing to environment.yml.
conda env export | grep -v "^prefix: " > environment.yml
All right, forget about the joke. This is the baisc commands I used for my deep learning environment, where in this project, I'm using Tensorflow with keras.
conda create --name tf-keras
conda install tensorflow-gpu keras-gpu

conda install scikit-learn scikit-image pandas
conda install nb_conda matplotlib
But when you run the scripts, you may not get it pass, let me explain why:
Anaconda holds the package relations, e.g. tensorflow-gpu will fetch back what should be installed for tensorflow with a gpu on board. However, Anaconda has different platforms version and their service repo for holding the "tensorflow-gpu" is different + if you are on different platform, probably the packages(drivers) will be different. Not to mention there are some 3rd party repos that holds another differernt version of the relations.
But don't complain, first the scientists are not engineers, you don't want them to spend time on orgnizing the table tops. Secondly, it is truly hard to manage and test and publish a working version of relationships when you have hundreds of companies that updating their drivers monthly or so. I am thankful that there is something call Anaconda, well actually if they can donwload the same package only once when you trying to reinstall your environment, that will reduce a lot electricity consumption on the earth.
2+3. Read images, channels & numpy
Use imread_collection to read images from a folder.
Use os.path.join() to form your saving path
Use io.save() to save back your images.
There is a little bug to be noticed, I replace the image folder name to be the processed folder name by simple string replacing, but if your file path contains a second image folder name then there will be a problem.
E.g. images at ~/data_sets/train/data if you replace data to label, then what you mean is ~/data_sets/train/label but you will get ~/label_sets/train/label. not a big problem, I know you can workaround with it.
import os
import numpy as np
import skimage.io as io
from skimage.io import imread_collection

def preprocess_and_save(data_set_path, train_or_test, target_img_folder,
                       save_to_label_folder_suffix='_preprocessed'):
    target_path = os.path.join(data_set_path, train_or_test, target_img_folder, '*.png')
    col = imread_collection(target_path)

    save_to_dir = os.path.join(data_set_path, train_or_test, target_img_folder+save_to_label_folder_suffix)
    if not os.path.exists(save_to_dir):
        os.makedirs(save_to_dir)
    idx = -1
    for idx, item in enumerate(col):
        file_path = col.files[idx]
        file_path = file_path.replace(target_img_folder, target_img_folder+save_to_label_folder_suffix)

        smoothed = preprocess(item)

        io.imsave(file_path, smoothed)

    return idx+1  # couting number of processed items
I'm offering you some handy functions and frame work to setup your pipeline.
Becareful about the image format with their channels
For most common used format .png, my windows software stores the greyscale image in three same value channels, so don't think it is a single channel image. And we I say channel, it is just the depth value for the pixel color.
Another Tip is traditionally, a back & white image has no channels, means the image[x:y] = value not image[x:y] = [value]! That means if you what to do something on your image with a kernel, then you have to shape the kernel correctly.
I know, handling the ndarray shape is extremly frustrated...
from skimage.color import rgb2gray

def binarized(npimage, bw_threshold=150):
    """
    convert an uint8 value image into 0/1 binary image
    :param npimage: numpy image array (nd array)
    :param bw_threshold: for all pixels < threshold black set to 0.0
    :return: npimage
    """
    # binarized: make all pixels < threshold black
    npimage = 1.0 * (npimage > bw_threshold)

    return npimage

def get_kernel(npimage):
    """
    get the correct kernel to match the image shape.
    for bw image, it has a shape (x, y)
    for grey/rgb image(png format) it has (x, y, [grey depth]) / (x, y, [r ,g, b])
    """
    kernel = np.ones((5,5))
    if len(npimage.shape) > 2:
        # this image has a color depth channel
        depth_channel = npimage.shape[2]
        kernel = np.ones((5,5, depth_channel))

    return kernel

def preprocess(npimage, binarized=False):
    """
    :param npimage: numpy image array from imread_collection
    :param binarized: legacy API
    :return: numpy image array normalized value within range 0.0 ~ 1.0
    """
    npimage = rgb2gray(npimage)

    # process your images with some CV technics here !

    npimage = npimage * 255.

    return npimage
Be extra careful on your training image value
Based on my experience, most of the network is designed for the activation input between 0.0 ~ 1.0. In theory 0~255. should also work, but I did not look deep into the CNN's implementation and I tried the 255 value range, it does not work and you will not get any hint besides from me. (maybe I'm just stupid.)
4+5. Which Network should I use? How to tell right or worng?
I used U-Net in my application, because the problem is more like a change detection. If you don't know which network to use, I would suggest you to ask around from some experienced people in this domain and describe your application cases to them to get an advice.
About U-Net:
This aricle here is pretty good in explaining it and some general knowledge.
How to tell right or wrong?
Find a frame work and run it to see if you accuracy is increasing over the time. If your loss or accuracy is wired, then 60% is your data problem and if you copied a network from an Internet, it may contains problem too. So don't trust the Internet too much, I suggest, try copy from three different ones and see the results.
This is a running and working case:
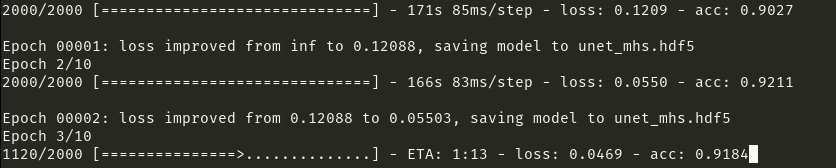
Where you training code should look similar to this:
from model import *

from data_aug import Helper

my_gene, image_shape = Helper.create_train_img_gen()

model_unet = unet(image_shape)
model_unet.summary()
model_checkpoint = ModelCheckpoint('unet_mhs.hdf5', monitor='loss',verbose=1, save_best_only=True)

print(image_shape)
model_unet.fit_generator(my_gene, steps_per_epoch=2000,epochs=10,callbacks=[model_checkpoint])
6. Data Generator/Augmentor
The hardest part in deep learning is to get enough data, and it is usually impossible to do with two hands. So we need generator, it is not hard to code it but it is hard to tweak it and think about what would be the correct cases. Here is a sample framework I wrote for generating (train, label) pairs.
from keras.preprocessing.image import ImageDataGenerator, load_img, img_to_array, array_to_img
import os
import numpy as np

def trainGenerator(batch_size,
                   train_path,
                   image_folder,
                   mask_folder,
                   bkg_npimg,
                   data_gen_args,
                   image_color_mode ="rgb",
                   mask_color_mode = "rgb",
                   image_save_prefix  = "image",
                   mask_save_prefix  = "mask",
                   flag_multi_class = False,
                   num_class = 2,
                   save_to_dir=None,
                   synthesize=False,
                   target_size=(None, None),
                   seed=1):
    '''
    can generate image and mask at the same time
    use the same seed for image_datagen and mask_datagen to ensure the transformation for image and mask is the same
    if you want to visualize the results of generator, set save_to_dir = "your path"
    '''
    image_datagen = ImageDataGenerator(**data_gen_args)
    mask_datagen = ImageDataGenerator(**data_gen_args)
    image_generator = image_datagen.flow_from_directory(
        train_path,
        classes = [image_folder],
        class_mode = 'binary',
        color_mode = image_color_mode,
        target_size = target_size,
        batch_size = batch_size,
        save_to_dir = save_to_dir,
        save_prefix  = image_save_prefix,
        seed = seed)
    mask_generator = mask_datagen.flow_from_directory(
        train_path,
        classes = [mask_folder],
        class_mode = 'binary',
        color_mode = mask_color_mode,
        target_size = target_size,
        batch_size = batch_size,
        save_to_dir = save_to_dir,
        save_prefix  = mask_save_prefix,
        seed = seed)

    train_generator = zip(image_generator, mask_generator)
    threshold = 0.5

    bkg_npimg /= 255.

    for (train_data, mask_data) in train_generator:
        # the generator returns a (data, label) pair, which is super annoying
        # we need to get rid of the label inside the data pair
        trainX = train_data[0]
        labelY = mask_data[0]

        if synthesize:
            trainX = np.where(labelY > threshold, trainX, bkg_npimg)

        yield (trainX, labelY)

"""
Config the generator properties here
"""
data_gen_args_global = dict(
    # you have to code your own params here !
    )

def make_my_generator(data_gen_args,
                      data_set_path, train_or_test, data_folder, label_folder_path,
                      bkg_filename='Global_bkg_when_finished_Color.png', synthesize=False):
    # data_set_path ='data_sets/edged_input_original_label_1024x576/'
    train_path = os.path.join(data_set_path, train_or_test)
    bkg_npimg = img_to_array(load_img(os.path.join(data_set_path, bkg_filename)))
    shape = bkg_npimg.shape

    image_gene = trainGenerator(1, train_path, data_folder, label_folder_path,
                                bkg_npimg,
                                data_gen_args=data_gen_args,
                                target_size=(shape[0], shape[1]),
                                synthesize=synthesize,
                                # save_to_dir='augmented',
                                num_class=2)

    return image_gene, shape
7. How to improve your accuracy
In general, reduce the distractions in data and confusions in your label.
For exmaple, reduce the light distribution effect in training data and smooth the noisy edges in your labels.
And in the end, do a small portion then test your program then do the next portion.
Thank you for reading, this is a long post...